
If you want to use a kernel of an Anaconda virtual environment (Conda environment) in JupyterLab, you need to add the kernel of the virtual environment to Jupyter in advance. In this article, I will provide step by step how to do it.
Prerequisite environment
- windows 10 (64bit)
- anaconda 4.8.2
Create a virtual environment
Create a virtual environment named temp_venv with the following command. Install Python 3.8 and Jupyterlab together to see how it works.
conda create -n temp_venv python=3.8 jupyterlabOnce the virtual environment has been created, use the following command to move from the base environment to the created virtual environment.
conda activate temp_venvAdd the kernel of the virtual environment to Jupyter
Install ipykernel.
pip install ipykernelNext, add the kernel of the virtual environment to Jupyter.
python -m ipykernel install --user --name=temp_venvCheck if the kernel has been added
If you see temp_venv in the available kernels, you have succeeded.
jupyter kernelspec listLaunch JupyterLab to check.
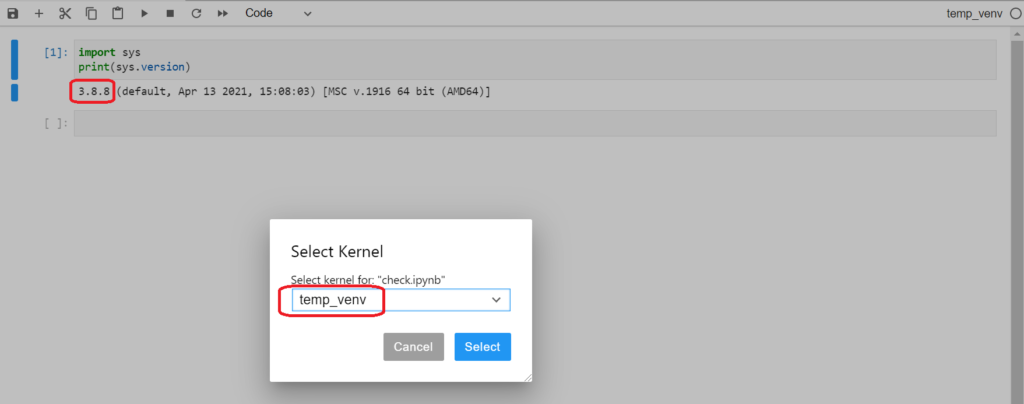
We can now select temp_venv and also see that the python version is 3.8 installed in the virtual environment (the base environment has version 3.6).
If you no longer need the kernel you added, you can delete it as follows.
jupyter kernelspec uninstall temp_venvIf you want to know how to build a Conda environment, check out this article.


コメント